How to create a MySQL database from the command line
Last updated on June 6, 2020 by Gabriel Cánepa
To create a MySQL database from the command line, you can use mysql command-line client. Here is a step-by-step procedure to create and populate a MySQL database using mysql client from the command line.
Step One: Install MySQL Client
Of course you need to make sure that MySQL client program is installed. If not, you can install it as follows.
For Debian, Ubuntu or Linux Mint:
$ sudo apt install mysql-client
For Fedora, CentOS or RHEL:
$ sudo yum install mysql
Step Two: Log in to a MySQL Server
To begin, first log in to your MySQL server as root with the following command:
$ mysql -u root -h <mysql-server-ip-address> -p
Note that to be able to log in to a remote MySQL server, you need to enable remote access on the server. If you are invoking mysql command on the same host where the MySQL server is running, you can omit "-h <mysql-server-ip-address>" as follows.
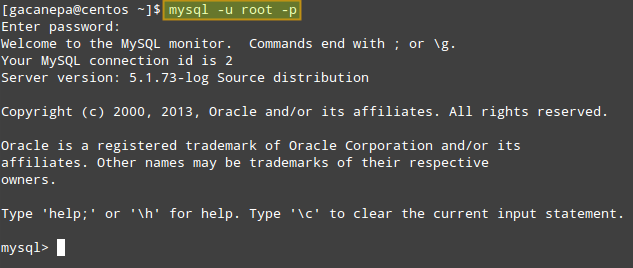
$ mysql -u root -p
You will be then asked for the password of the MySQL root user. If the authentication succeeds, the MySQL prompt will appear.
Step Three: Create a MySQL Database
Before you start typing commands at the MySQL prompt, remember that each command must end with a semicolon (otherwise it will not execute). In addition, consider using uppercase letters for commands and lowercase letter for database objects. Note that this is not required but helpful for reading.
Now, let's create a database named xmodulo_DB:
mysql> CREATE DATABASE IF NOT EXISTS xmodulo_DB;

Step Four: Create a MySQL Table
For a demonstration purpose, we will create a tabled called posts_tbl where we want to store the following information about posts:
- Text of article
- Author's first name
- Author's last name
- Whether the post is enabled (visible) or not
- Date when article was posted
This process is actually performed in two steps:
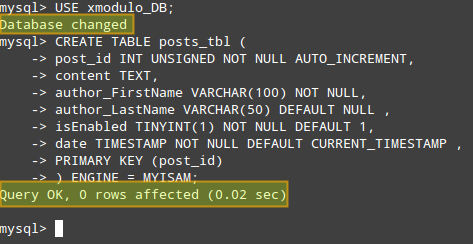
First, select the database that we want to use:
mysql> USE xmodulo_DB;
Then create a new table in the database:
mysql> CREATE TABLE 'posts_tbl' (
'post_id' INT UNSIGNED NOT NULL AUTO_INCREMENT,
'content' TEXT,
'author_FirstName' VARCHAR(100) NOT NULL,
'author_LastName' VARCHAR(50) DEFAULT NULL ,
'isEnabled' TINYINT(1) NOT NULL DEFAULT 1,
'date' TIMESTAMP NOT NULL DEFAULT CURRENT_TIMESTAMP ,
PRIMARY KEY ( 'post_id' )
) TYPE = MYISAM;
Step Five: Create a User Account and Grant Permissions
When it comes to accessing our newly created database and tables, it's a good idea to create a new user account, so it can access that database (and that database only) without full permissions to the whole MySQL server.
You can create a new user, grant permissions and apply changes in two easy steps as follows:
mysql> GRANT ALL PRIVILEGES ON xmodulo_DB.* TO 'new_user'@'%' IDENTIFIED BY 'new_password';
mysql> FLUSH PRIVILEGES;
where new_user and new_password refer to the new user account name and its password, respectively. This information will be stored in the mysql.user table, and the password will be encrypted.
Step Six: Testing
Let's insert one dummy record to the posts_tbl table:
mysql> USE xmodulo_DB;
mysql> INSERT INTO posts_tbl (content, author_FirstName, author_LastName)
VALUES ('Hi! This is some dummy text.', 'Gabriel', 'Canepa');
Then view all the records in posts_tbl table:
mysql> SELECT * FROM posts_tbl;
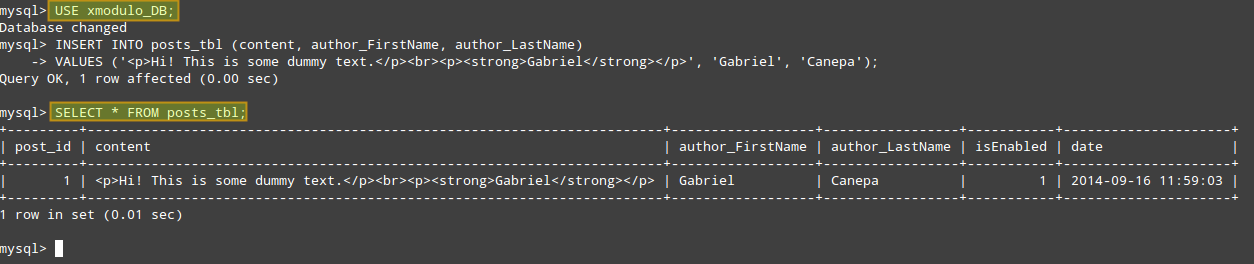
Note that MySQL automatically inserted the proper default values in the fields where we defined them earlier (e.g., isEnabled and date).
Support Xmodulo
This website is made possible by minimal ads and your gracious donation via PayPal or credit card
Please note that this article is published by Xmodulo.com under a Creative Commons Attribution-ShareAlike 3.0 Unported License. If you would like to use the whole or any part of this article, you need to cite this web page at Xmodulo.com as the original source.

Xmodulo © 2021 ‒ About ‒ Write for Us ‒ Feed ‒ Powered by DigitalOcean