How to record a particular area of desktop screen on Linux
Last updated on October 18, 2020 by Dan Nanni
When you need to demonstrate your desktop activities to someone else, using a screencast (i.e., recording of desktop screen) is far more effective than a textual tutorial or a bunch of static images. For Linux command-line recording, you can use tools like TermRecord. For a video tutorial, sometimes you may want to record a particular area of the desktop (e.g., one GUI window), instead of the entire desktop screen. One way to create a screencast of a particular area of the desktop is by using recordMyDesktop.
recordMyDesktop is an open-source Linux tool that can capture audio and video of a desktop screen session. It can record not only the whole desktop screen, but also a particular GUI window or any arbitrary area that you define with a mouse.
Install recordMyDesktop on Linux
recordMyDesktop is a command-line tool, but can be better used with its GUI frontend gtk-recordMyDesktop. Here is how to install them on various Linux distros.
Ubuntu, Debian or Linux Mint:
$ sudo apt-get install recordmydesktop gtk-recordmydesktop
Fedora:
$ sudo dnf install recordmydesktop gtk-recordmydesktop
CentOS or RHEL:
First enable EPEL repository, and then proceed with:
$ sudo yum install recordmydesktop gtk-recordmydesktop
Arch Linux:
$ sudo pacman -S recordmydesktop gtk-recordmydesktop
Record a Particular GUI Window on Desktop
To record a particular window on desktop, click on Select Window button on gtk-recordMyDesktop. Then move the mouse cursor to a target window that you wish to capture, and click on any area within the window.

The boundary of the chosen window will be highlighted. Note that if you move the window after this, the highlighted area will remain unchanged, so be careful.
If you want to exclude the specified window's title bar from recording, turn off Include Window Decorations option in Advanced menu.
To start recording the window, click on Record button on gtk-recordMyDesktop.

Once the recording gets started, gtk-recordMyDesktop's main window will disappear automatically.
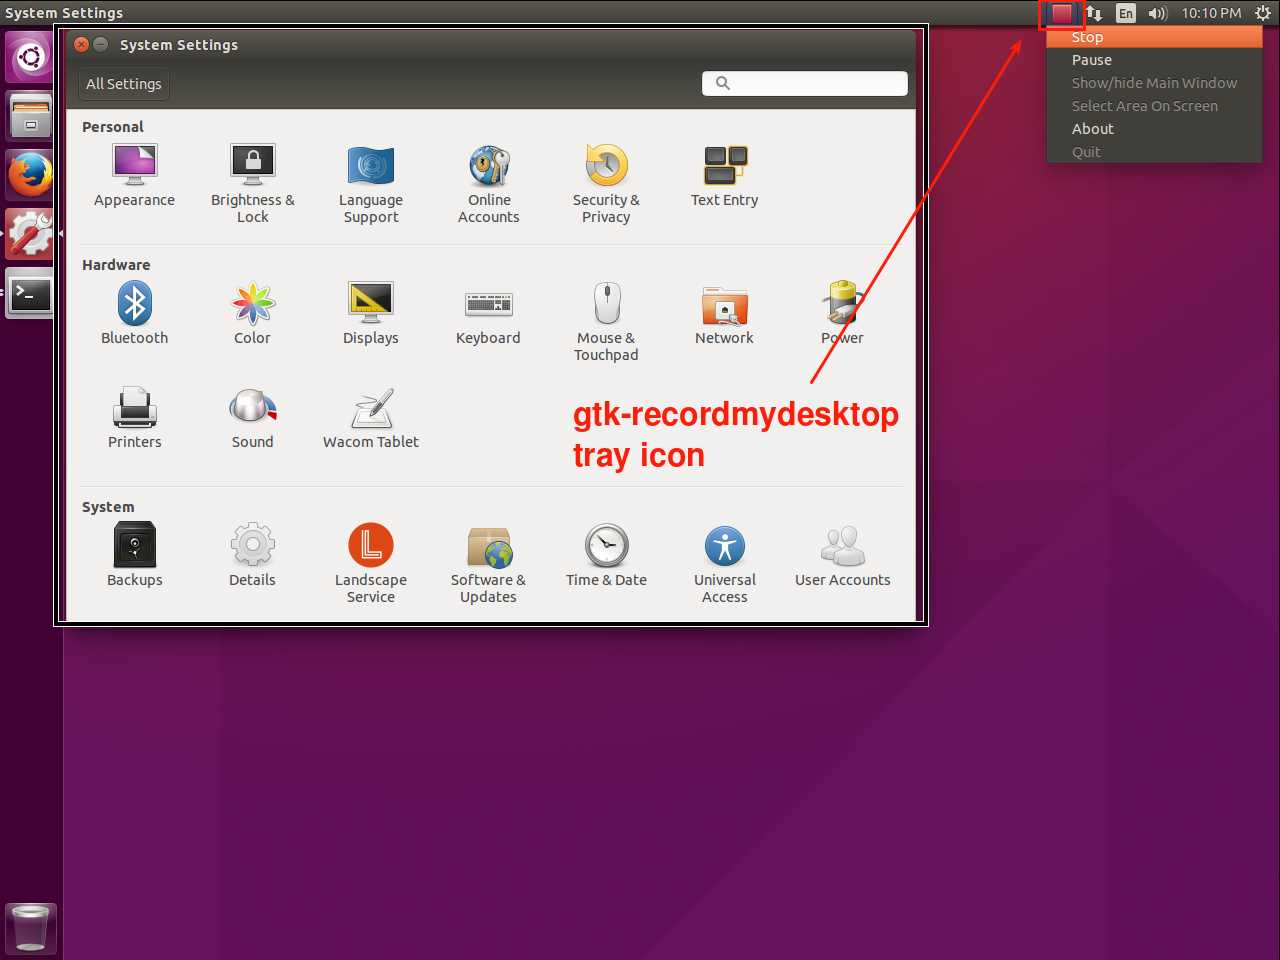
If you want to stop the recording, click on the recordMyDesktop's tray icon at the top of the desktop, and choose Stop.
The recorded screencast will be saved as .ogv file. You can play .ogv file with any video player such as mplayer or vlc. or upload it directly to YouTube without any transcoding.
Record any Arbitrary Area on Desktop
If you want to create a screencast of a particular area of desktop, click on the recordMyDesktop's tray icon. Then choose Select Area on Screen.

This will change the mouse cursor to a cross. Now left click and drag a mouse to define an area.
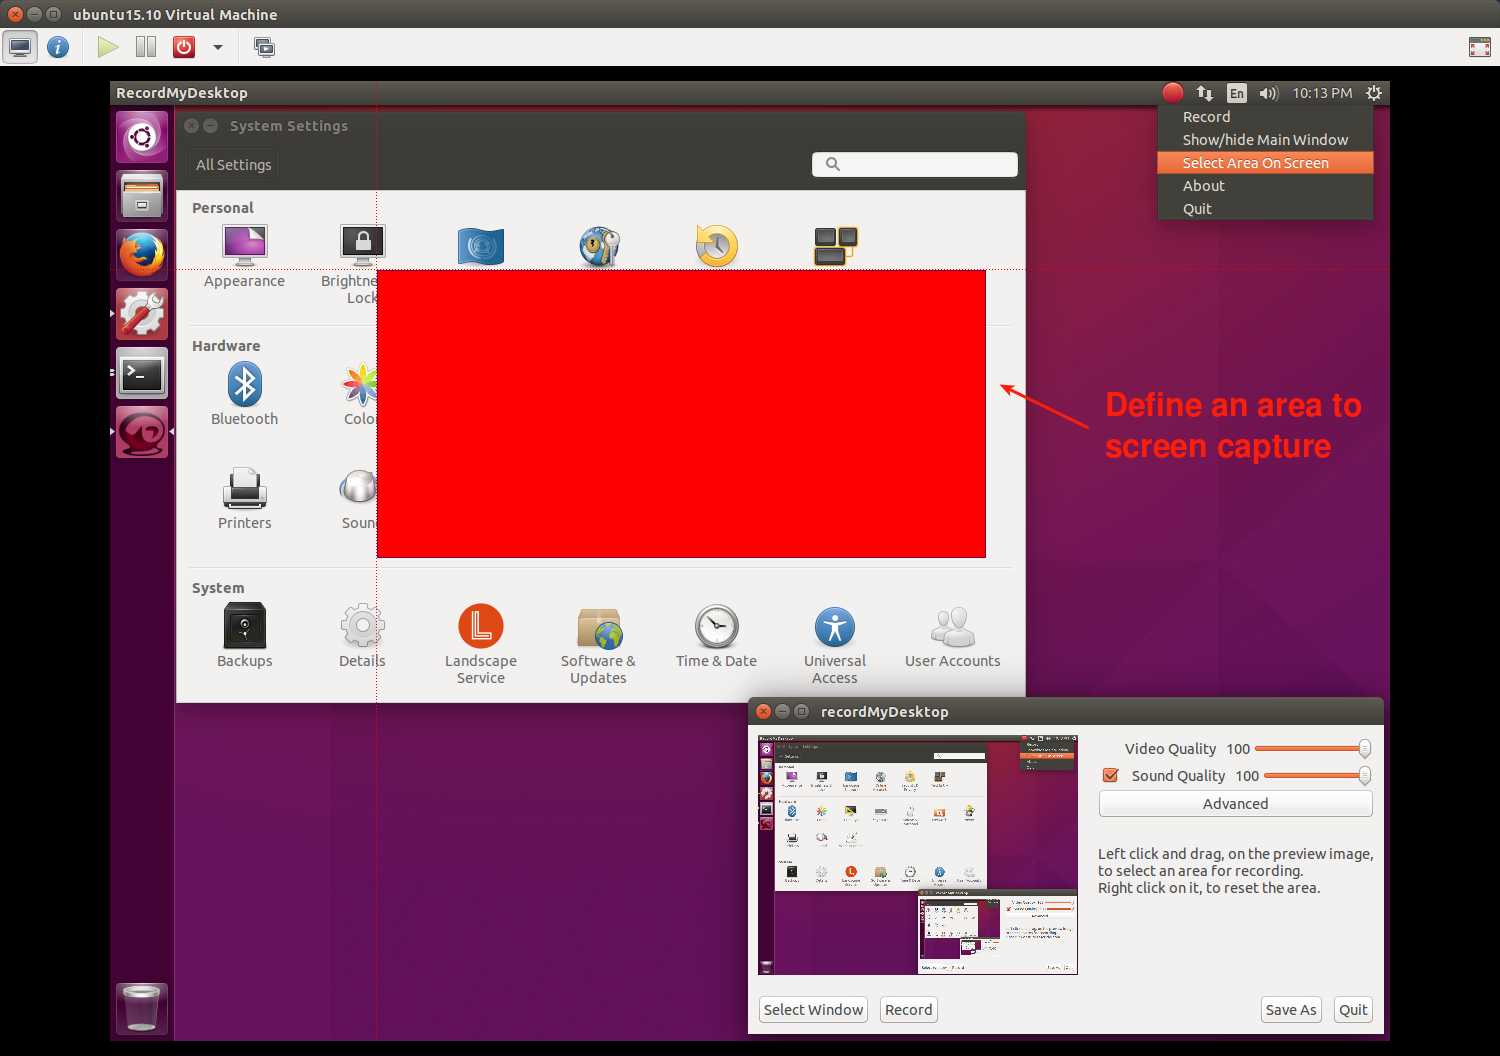
Once you release a mouse, the area will be highlighted and ready for recording. Click on Record button to start the recording.
Here is a screencast of gtk-recordMyDesktop. :-)
Support Xmodulo
This website is made possible by minimal ads and your gracious donation via PayPal or credit card
Please note that this article is published by Xmodulo.com under a Creative Commons Attribution-ShareAlike 3.0 Unported License. If you would like to use the whole or any part of this article, you need to cite this web page at Xmodulo.com as the original source.

Xmodulo © 2021 ‒ About ‒ Write for Us ‒ Feed ‒ Powered by DigitalOcean